Sunday, November 30, 2008

Snowman ornament card


Today in my Technique class we used the Masking Technique. Here is the card we made using the snowman from Jolliest Time of the Year. The ornament is a separate piece attached with dimensionals.

Bon Appetit Recipe Book

I started out with an On Board 5 x 5 Journal. I turned the journal spiral up to make it easier for the book to stand. It also makes it easier to write in. I stamped out the chef from Voila for my cover. For the tabs on the side I punched out 6 tabs using the Round Tab punch and Very vanilla card Stock. I then stamped each side with a food stamp using the From the Kitchen of stamp set.You can make extra pages to go into you Recipe Book using the Spiral punch.

Snow Swirled Tree card

The Sizzix Top note is the perfect size to stamp out these images from the Snow Swirled Stamp set. I sponged a little Creamy Caramel around the edge and on any blank area. Using some two-way glue and Dazzling Diamond Glitter I sparkled some of the tree.

Saturday, November 29, 2008

Christmas Tree Card


Here's a Christmas card I made using the new Striped Background stamp and the tree from the Jolliest Time of the Year. To dress up the tree I used gold brads and punched a star out of Gold Brushed card stock.

Friday, November 28, 2008

Felt Flurries Door Draft stopper


Today I made this cute Door Draft stopper. 
You will need a piece of material 8" x 44". Using a package of the Little Felt Flurries, I glued (tacky glue) on the Riding Hood Red snowflakes to my material. I then stamped the snowflake from Punch Pal Stamp set and punched it out using the 1/2" circle punch. Placed it 
in a build a brad then applied  it thru the larger of the 3 snowflakes and cloth material. Folding the right side in length wise, I then sewed the length of the material leaving 1/2" sewing allowance.  Turning it right side out. Then stuffed batting and dried lentils. I then tied the ends off with Riding Hood Red 1-1/4" Striped Grosgrain Ribbon.

Wednesday, November 26, 2008

Snowflake Bucket


If you don't all ready own the Sizzix snowflake, here is another reason to get it. As you can see each of these snowflakes come from the same snowflake. I just cut some portions off. For some of the snowflakes I cut pieces and reattached them off the edge just a little bit.

I purchased this Red Bucket at Walmart, in the seasonal area.

Tuesday, November 25, 2008

Glass Present

Here is my latest Christmas decoration. I took one of those glass boxes from Lowes with the hole all ready pre-drilled put LED lights, pine cones and greenery in it. Covered the front and back with the Stampin' Up! Snowflake Shimmer Decor Decals. and for the final touch I added the Riding Hood Red 1-1/4" striped grosgrain ribbon. It is beautiful when lit. 

Monday, November 24, 2008

Season of Thanks

Some of you might remember the Spooky Decor Element that hung on my door, posted September 19. I used the same frame and removed the plexi-glass with the Spooky Spider. Then I  replaced it with plexi-glass that has the Season of Thanks Decor Element. Instead of using the Screen netting on the back I stapled some beige cloth to it.

Saturday, November 22, 2008

Happy Thanksgiving


Thanksgiving is not far away. Take the time this week to be thankful. 
In this card I used the Voila in combination with the Voila to go stamp set to make this card. The turkey is is done in several layers. This makes the turkey jump out of the card.

Thursday, November 20, 2008

Bon Appetit Coaster framed art


 I created another coaster framed art. I took an inexpensive frame purchase at Ikea. I removed the thin plexi-glass and attached some window screen. Took one of those paper coasters  stamped on an image, sponged the edges and punched holes in each corner(using the crop-a-dile). Then I attached it with black brads to the window screen. Making another cute gift idea. I made 2 of these. One will go to my neighbor Kris and the other is for a gift swap tonight at my upline meeting.

Wednesday, November 19, 2008

Snowman tag card


Here is my latest card creation.
It is a little hard to see but the base of the card is wheeled with real red using the jolly wheel. The snowman from Jolliest Time of the Year is stamped in Sahara Sand.  The Snow Swirled stamp set provided the words. I used Creamy Caramel around the edge of the tag, curled up the edge and applied a few tears to give it an older look.  

Tuesday, November 18, 2008

Diet Coke Snowflake ornament


Using your craft and rubber scissors you can cut apart a Diet Coke can. With our awesome BIG SHOT that cuts thru over 50 items and the snowflake die I cut 2 snowflakes(you need 2 cans) attached them with a dimensional and hung it with real red ribbon. It gives a shimmery snowflake to adorn your tree. 

Sunday, November 16, 2008

Time to Create Clock


Is it time for you to create? 

With a little bit of vinyl and the Sizzix GoGo Boots I made this clock to hang in my craft room.

Saturday, November 15, 2008

Winter Post Accordion file box


Hooray for me that I have such a great friend like Luann who is willing to provide me with the measurements to make an accordion file box.  With a little stamping magic, here is what I have come up with. 
Now I just need to make some hand stamped cards to fill it and it will make a great gift for someone. 
In case you are wondering the beautiful button in the center is made from the snowflake stamped in Riding Hood Red punched out with a 1" circle punch. 

Friday, November 14, 2008

Welcome Back Laura


This is the card I made to send Laura, my roomie from Convention. Her family has moved back to the Hampton Roads area. I am so glad to have her near by and look forward to stamping together.
 This image is from the Neighborhood jumbo wheel. I used the aquapainter to color it in.  

Thursday, November 13, 2008

Snow Swirled ornament card


Here is an ornament card Luann and I created using Lenore's awesome idea for ornament toppers. The snowflakes are embossed to give the card some texture. When I look at these ornaments I think of the recessed glass ornaments I had on the tree when I was a little girl. If you look long enough at it you might just think the center goes in, too.

Wednesday, November 12, 2008

Regional make and takes.


Here are a few of my completed make and takes from the Va Beach Regionals. Each project uses cute embellishments. This 8-1/2" scrapbook page uses the snowflake from the Best Wishes & more stamp set. 

The tree comes from the Scandinavian Season set from the Holiday mini. I wasn't sure if I like this set at first, but after water coloring it, I realize how beautiful this image can be.

Monday, November 10, 2008

Happy Birthday Ryan!


Tomorrow is my son's birthday. Here is the card I made him. I really like using cupcakes for birthday cards. I think they are a great choice because who wouldn't like getting a cupcake on their birthday?

Sunday, November 9, 2008

Snowmen Wishes Card


I made this card for a swap. On November 6 it was published on Stampin' Up! Stampers Showcase. 

Friday, November 7, 2008

Warm wishes ornament card


Tomorrow is the Stampin' Up! Regional in VA Beach. I made a few of these ornament cards to swap. Hopefully I can get some more swaps made tonight. This card opens up and down. I folded the cardsotck in half and cut the circle so there would be a hinge on top. The tab is only attached to the front of the card.

Wednesday, November 5, 2008

Snowman gift card


   I made this snowman gift card holder for a swap today. I am posting a cheat sheet, so you can make him too. His arms came from the Sizzix snowflake. His bodyis made from a 1-3/4", 2-1/2" and 3" circles. The rest of the shapes come from our line of punches. Don't forget to sponge around the white circles before putting him together. 

Sunday, November 2, 2008

Winter Post


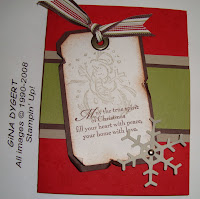
Last night we recreated this adorable card. It was definitely a group effect. Thank you Faith, Luann, Lorrie and Norma for your help and the needed supplies I did not have. I am think about framing this one. This is definitely a WOW card!